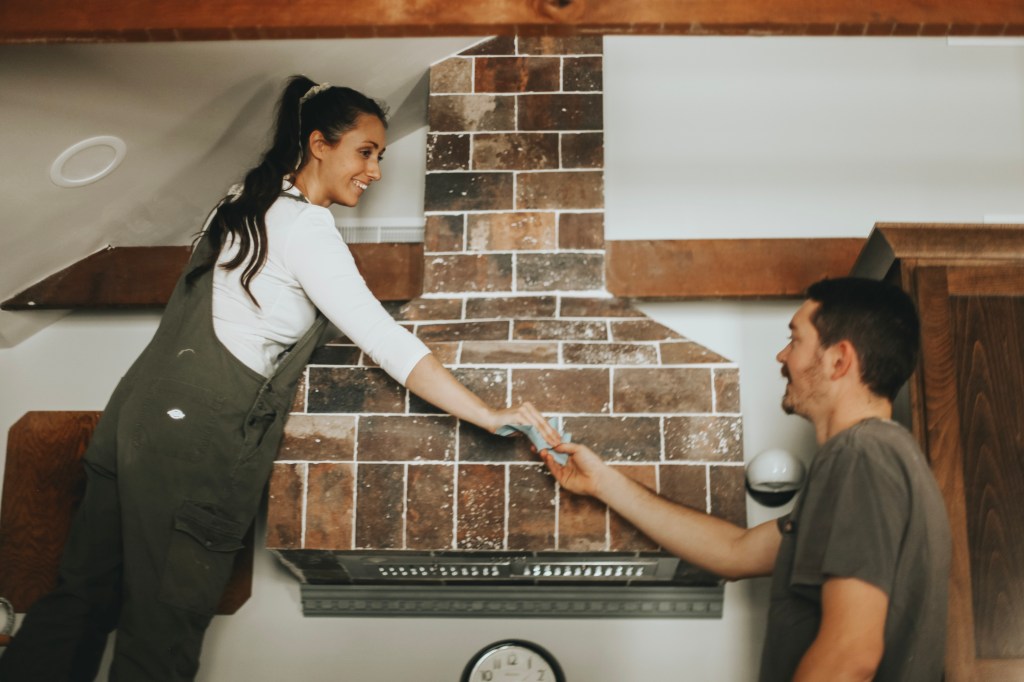
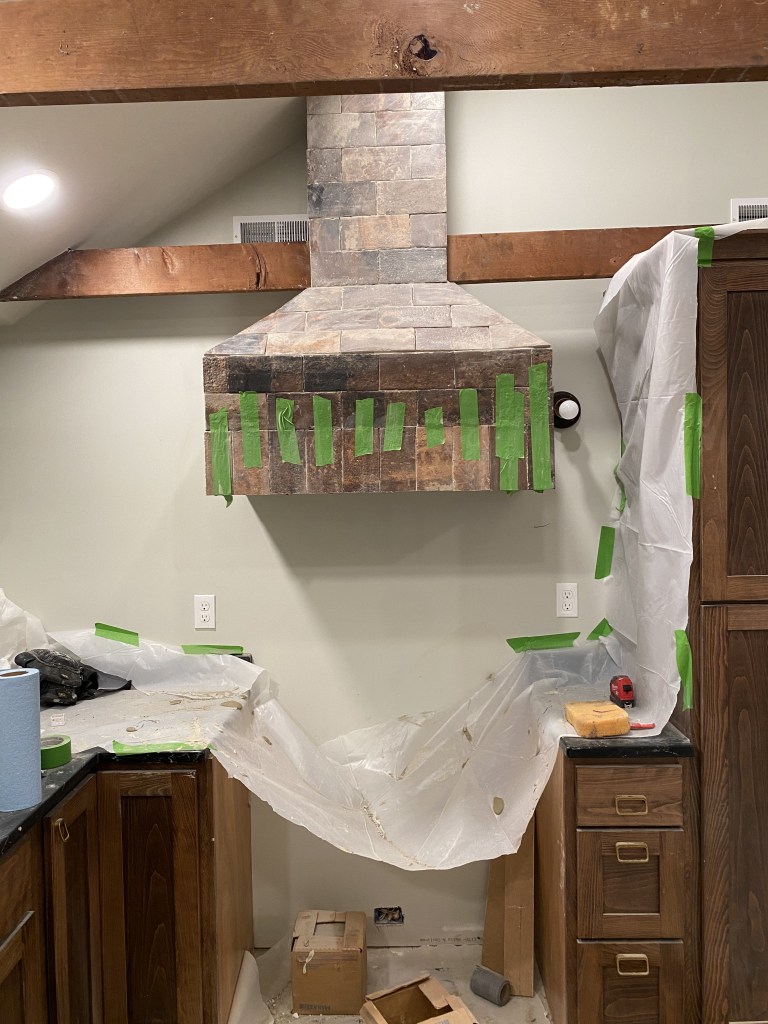
Jaden and I love original character. Germaine was built in the 1940’s so our goal for this tiny house was to create a vent hood over the stove that looks like a chimney. It wasn’t all too hard and it was actually cost friendly.
Before we begin, this is not an step by step plan, but we hope it inspires something for you.
Let’s break down how we did it!
This post may contain affiliate links. That means if you purchase anything from these links I earn a small commission, at no extra cost to you!
Supplies
If you build any vent hood, you’re going to need an insert. This is the Range Hood Insert that we used. It has a bright LED lights underneath and there are 3 air settings. Our cabinet maker said that when possible, your vent hood should be 6 inches wider than your stove so take that into consideration when you build. That would be a 3 inch overhang on each side of the stove.
Side note: If you want under mount lights like the range hood insert has linked above, you’ll need electrical wiring running to it.
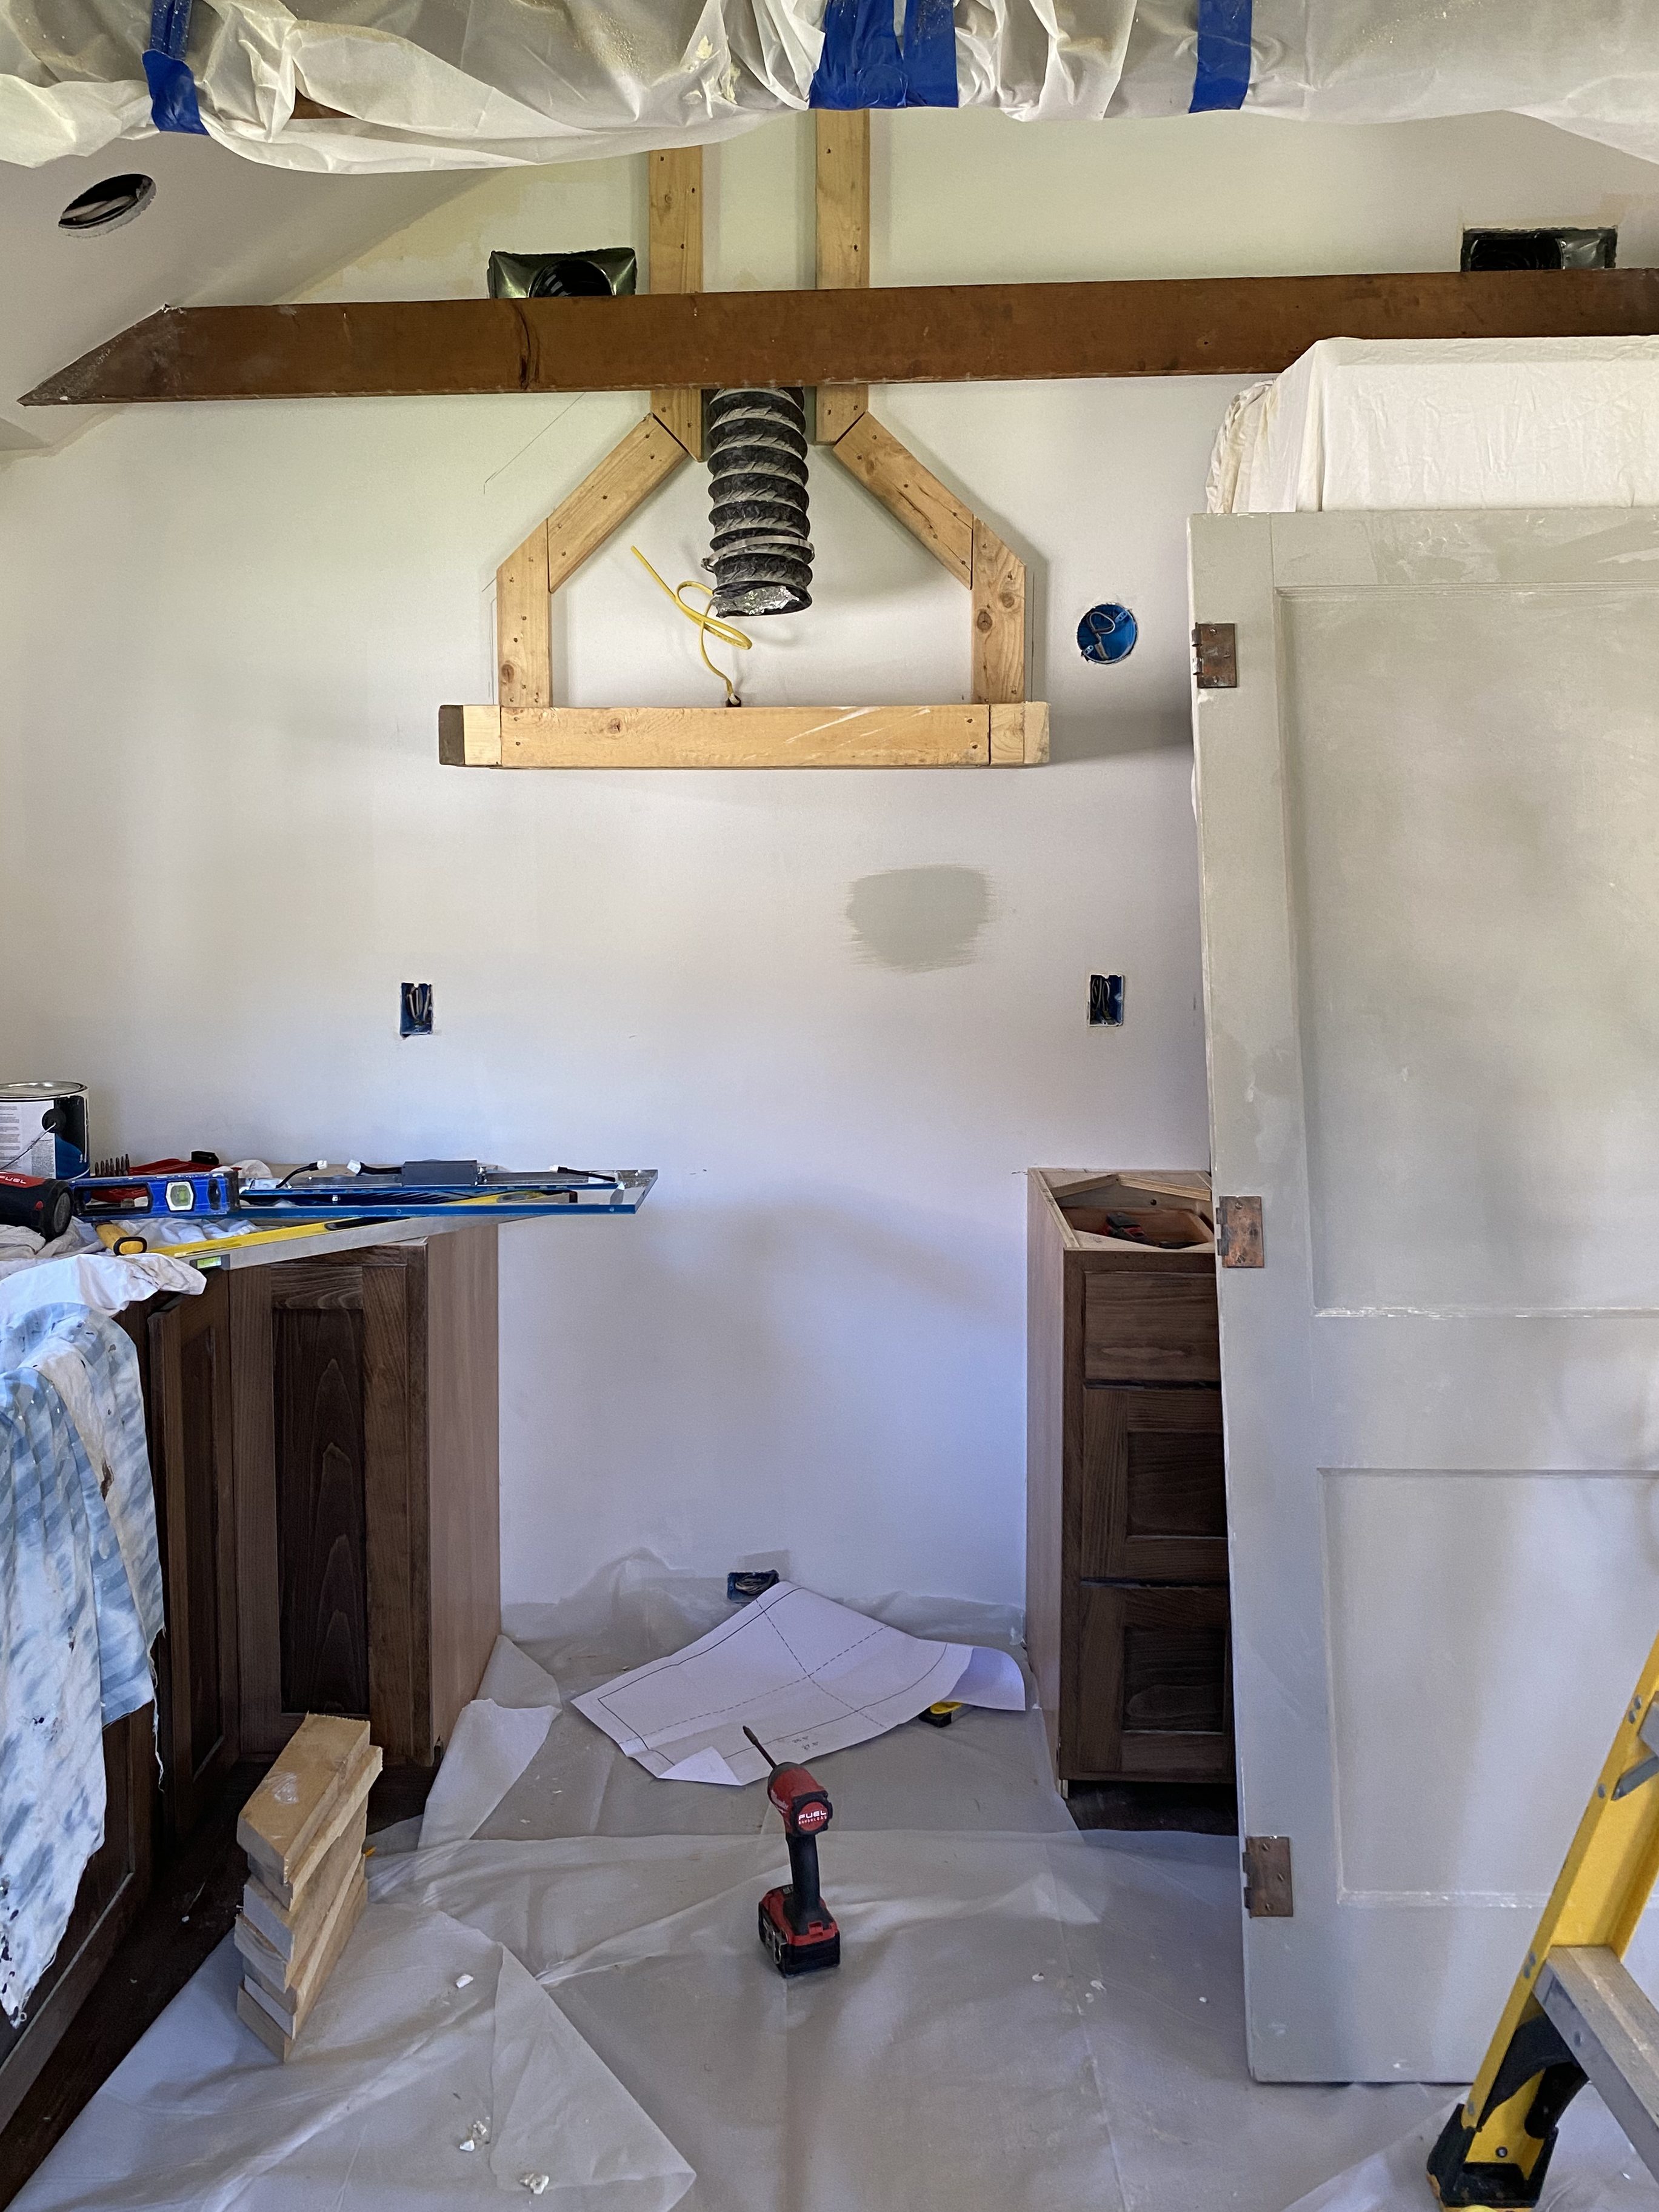
You can purchase vent hood inserts that don’t need to vent outside. If you want a cleaner ventilation system, I recommend venting outside. Luckily Germaine had no walls so we purchased an extremely long air duct and connected it to the bathroom ventilation which led outside on the south wall. This is Flexible Air Duct we used.
Other supplies will include: 2×4’s, wood screws, level, drill and bits, cement board, tile, mortar, grout and maybe some extra hands!
Let’s Build It
Once you have your Range Hood Insert and Flexible Air Duct — it’s time to start building! We had the luck of having a 2×6 beam going through the hood which provided a lot of support. In full honesty, we don’t know how well this design would hold up without that beam. But here’s how we secured ours:
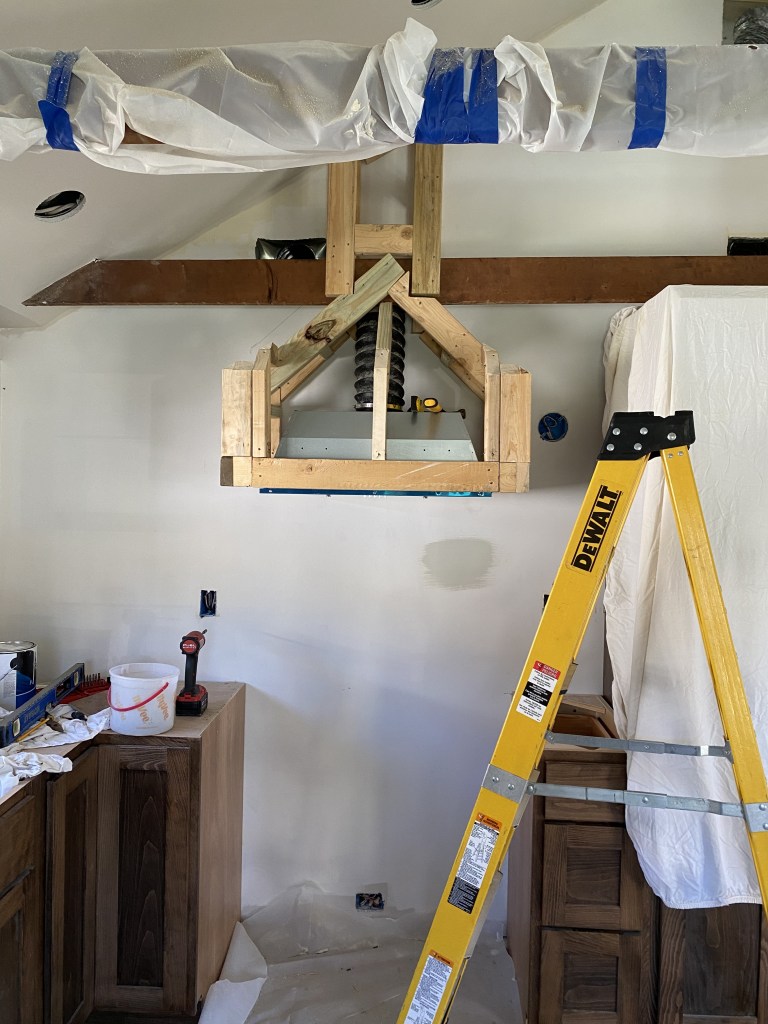
Once we built the frame, we secured cement board to the frame. Now here’s where we got lucky again… the tile we put on here was practically free. We bought thousands of dollars worth of tile for only $100 at a salvage yard. That’s how we tiled Germaine’s shower too!
You can spend a wide range on brick tile from simple box store tile to reclaimed brick. This is where I can’t provide you a direct link of what I used… so happy hunting!
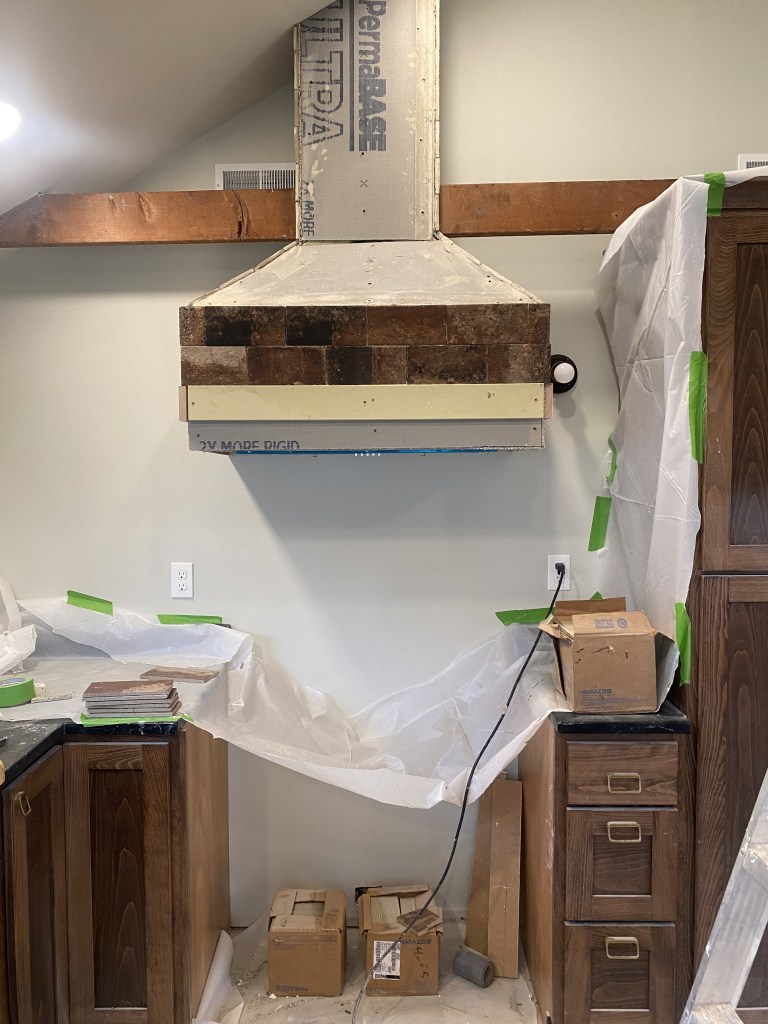
Side note: The vertical board you see above is called a plumb line. It was crucial for this project because the tile was so heavy it would slip. This ensured we laid the base line straight.
We spent a day just laying the tile and it was one of my favorite jobs yet. It’s supposed to resemble an old chimney, so it didn’t have to be perfect! We decided on a traditional brick pattern with a vertical brick as a solider pattern on the bottom. We had some extra dentil moulding that we finish nailed under the vent hood for some unexpected character. After going back through and grouting everything, our vent hood was officially done.
Would you do this?
All in all with building materials (while reusing what we had on hand), vent hood insert, duct work, and our time, this cost under $400. I would recommend this to any DIYer simply because of how custom you can make it look with the endless options of shapes and sizes. If you’re going to tile it though, make sure you YouTube building 101 because it needs to be strong enough to carry the weight.

Let me know in the comments what DIY you’d like to see next!
x Emma

Leave a comment